A vegetable garden needs a slightly different approach to winter preparation than a general ornamental garden.
Some crops should be harvested and removed. Others can remain in the soil for weeks or even through winter. Soil needs protection, empty beds need attention, and perennial or hardy vegetables may benefit from a different approach than tender summer crops.
Knowing how to winterize a vegetable garden is therefore less about clearing everything before winter and more about deciding what to harvest, what to remove, what to protect, and how to leave the soil in good condition for the next growing season.
This guide provides a practical whole-vegetable-garden winterization workflow without going deeply into individual winter vegetable growing techniques.
What Does It Mean to Winterize a Vegetable Garden?
Winterizing a vegetable garden means preparing the growing area and remaining crops for the colder months.
The process generally includes:
- Finishing the harvest
- Removing unhealthy plant material
- Deciding which crops can remain
- Clearing spent annual vegetables
- Managing weeds
- Protecting soil
- Adding appropriate organic matter
- Applying mulch where useful
- Checking raised beds
- Protecting vulnerable perennial vegetables
- Reviewing drainage
- Preparing tools and structures for winter
The exact process depends on your climate and the vegetables you grow.
A garden in a region with mild winters may continue producing vegetables, while a garden experiencing prolonged freezing temperatures may enter a much more complete dormant period.
When Should You Winterize a Vegetable Garden?
There is no single calendar date that works everywhere.
Instead, use several signals:
- Local first-frost timing
- Expected overnight temperatures
- Crop maturity
- Plant condition
- Soil conditions
- Forecasted prolonged cold
- Whether additional harvests are still possible
Tender summer vegetables often need attention before the first significant frost, while hardy vegetables may remain productive much longer.
This means vegetable-garden winterization is usually a gradual process rather than one afternoon of cleanup.
Step 1: Take a Final Inventory of the Garden
Before pulling anything out, walk through every vegetable bed.
Identify:
- Crops still producing
- Crops ready for harvest
- Crops that are no longer productive
- Hardy crops that can remain
- Diseased plants
- Weeds
- Empty areas
- Containers
- Raised beds
- Trellises and supports
This simple inventory prevents two common mistakes: removing productive plants too early and leaving unhealthy material behind.
Divide the garden into three groups
Harvest now:
Crops that are mature or unlikely to tolerate upcoming cold.
Leave in place:
Hardy crops that can continue growing or remain useful through winter.
Remove:
Finished, dead, diseased, or severely damaged plants that should no longer remain.
This makes the rest of the winterization process much easier.
Step 2: Finish Harvesting Tender Vegetables
Tender summer vegetables are usually the first part of the garden that needs attention.
Depending on your climate and crops, these may include:
- Tomatoes
- Peppers
- Beans
- Cucumbers
- Summer squash
- Basil
- Tender annual herbs
Harvest anything that is mature enough to use before a significant freeze threatens it.
Don’t wait until every leaf has been damaged if the crop is already ready to harvest.
But don’t harvest everything automatically
Some vegetables tolerate cold considerably better than others.
Hardy crops can often remain in the garden when conditions are suitable.
The objective is to protect the harvest without removing productive plants unnecessarily.
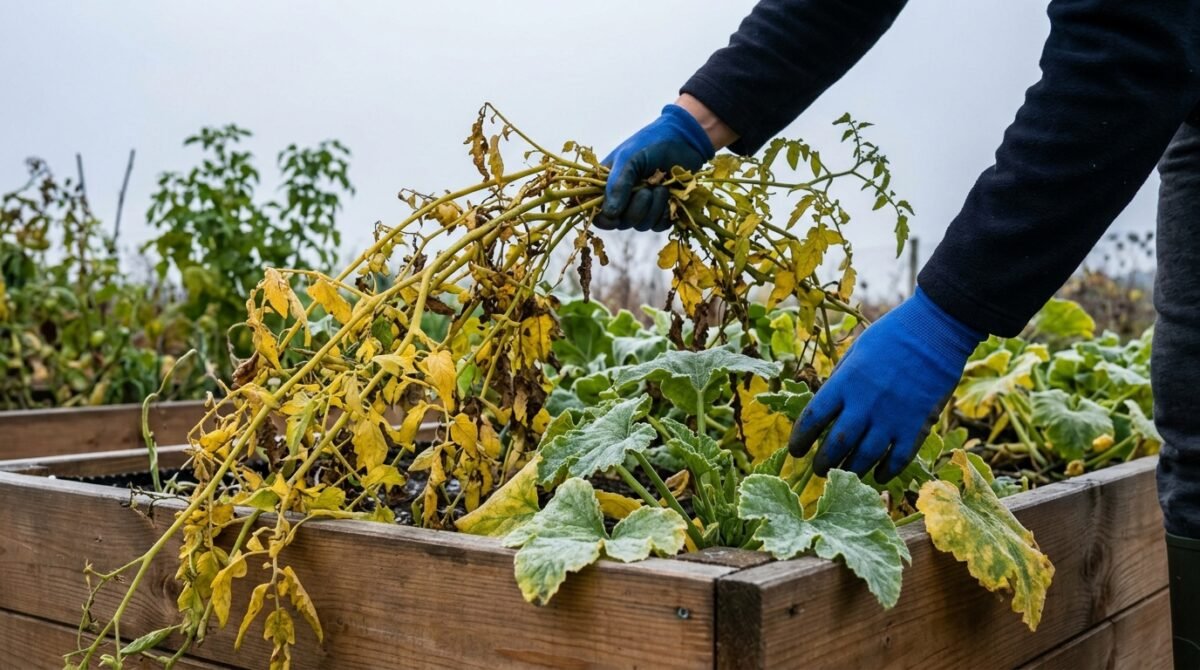
Step 3: Remove Finished Summer Crops
Once tender annual vegetables have finished producing, remove them where appropriate.
Look for plants that are:
- Completely dead
- No longer productive
- Severely damaged
- Diseased
- Collapsed
- Taking up space that will be used for winter protection or soil preparation
Removing finished crops can improve airflow and make beds easier to manage.
However, avoid treating every piece of plant material as waste.
Healthy plant residues may have different uses from diseased material, so make decisions based on their condition.
Step 4: Deal With Diseased Plant Material Carefully
Disease management deserves special attention when winterizing a vegetable garden.
If a plant showed obvious signs of disease during the growing season, don’t automatically leave its affected material on the bed.
Inspect for:
- Spotted foliage
- Rot
- Mold
- Cankers
- Unusual discoloration
- Persistent disease symptoms
Remove diseased material according to appropriate garden sanitation practices.
Avoid casually moving obviously diseased plant debris into areas where it could create problems later.
Healthy plant material can be handled differently, depending on your composting system and local conditions.
Step 5: Pull or Leave Vegetable Roots?
Not every vegetable needs to be completely removed from the soil.
The right choice depends on the crop and its condition.
Consider leaving suitable roots or remaining plant structures when they are:
- Healthy
- Not diseased
- Not interfering with the next crop
- Compatible with your garden-management approach
Some crops can also remain in the soil as living plants during colder periods.
The key is not to follow a blanket rule such as “remove everything” or “leave everything.”
Ask three questions:
- Is the plant healthy?
- Does leaving it create a problem?
- Will removing it provide a clear benefit?
Those questions are more useful than a rigid cleanup rule.
Step 6: Remove Weeds Before Winter
Winter is not a reason to ignore weeds.
Removing established weeds before they produce additional seed can reduce problems later.
Pay particular attention to:
- Mature weeds
- Seed-producing weeds
- Weeds growing around perennial vegetables
- Weeds competing with remaining crops
- Weeds growing through raised-bed edges
Avoid aggressively disturbing the entire soil surface simply to remove every small weed.
Hand-pulling or targeted removal is often preferable where practical.
Step 7: Protect the Soil
Soil is one of the most important parts of a vegetable garden to protect through winter.
Bare soil can be exposed to:
- Erosion
- Heavy rain
- Wind
- Repeated freezing and thawing
- Nutrient loss
- Compaction
Depending on your climate and garden system, you may protect the soil with:
- Mulch
- Cover crops
- Remaining healthy vegetation
- Appropriate organic matter
- Other suitable soil-covering methods
The best choice depends on whether the bed will remain productive, rest temporarily, or be planted again soon.
Step 8: Add Organic Matter When Appropriate
Winter preparation can be a useful opportunity to improve soil organic matter.
Depending on your gardening system, suitable materials may include:
- Finished compost
- Well-aged organic amendments
- Other materials appropriate for your soil and crops
Don’t assume that adding more material is always better.
The goal is to improve the soil rather than burying the bed under a thick layer of undecomposed material.
If you regularly use compost, apply it according to your soil needs and gardening system rather than treating winter as an automatic time for heavy amendment.
Step 9: Mulch Vulnerable Vegetable Beds
Mulch can help protect soil and moderate temperature fluctuations.
Appropriate materials may include:
- Straw
- Chopped leaves
- Finished compost
- Other suitable organic mulch
Mulch can be especially useful around perennial or overwintering vegetables.
However, avoid piling wet material directly against plant crowns.
Good winter mulch should:
- Protect the soil
- Help moderate temperature changes
- Reduce erosion
- Retain appropriate moisture
- Remain manageable in wet conditions
The correct depth depends on the material, crop, and climate.
Step 10: Prepare Raised Vegetable Beds
Raised beds can require additional attention because they often drain and respond to temperature changes differently from surrounding ground.
Inspect:
- Bed edges
- Corner joints
- Soil level
- Drainage
- Irrigation components
- Supports
- Covers
- Exposed soil
Look for erosion or soil loss around the edges.
If soil has settled significantly, address it using appropriate soil or organic matter rather than allowing the bed to gradually lose its growing depth.
Also check whether raised beds contain plants that require additional winter protection.
Step 11: Protect Vegetables That Will Remain
Not every vegetable garden becomes empty in winter.
Depending on your climate, some crops may remain productive or survive in the garden during cold weather.
If you plan to overwinter vegetables, consider:
- Their cold tolerance
- Expected temperatures
- Wind exposure
- Soil moisture
- Protection requirements
- Harvest timing
Suitable protection may include:
- Row covers
- Low tunnels
- Mulch
- Cold frames
- Other appropriate structures
Protection should be monitored rather than installed and forgotten.
Step 12: Check Drainage Before Winter Gets Wet
Vegetable beds should not remain saturated throughout winter.
Before the cold season becomes severe, inspect areas where water tends to collect.
Look for:
- Standing water
- Blocked drainage
- Low spots
- Overflowing containers
- Water collecting around plant crowns
Poor drainage can become especially problematic when water repeatedly freezes and thaws.
Correct drainage problems when soil conditions allow, but avoid walking or working heavily in saturated beds.
Step 13: Clean and Store Vegetable-Garden Supports
Winterization isn’t only about plants and soil.
Take time to inspect the equipment supporting your vegetable garden.
Clean and organize:
- Tomato cages
- Trellises
- Stakes
- Plant clips
- Row-cover hoops
- Garden ties
- Containers
- Harvest baskets
- Hand tools
Remove soil and plant debris where appropriate.
Store lightweight supports where strong winter winds cannot damage them.
If a trellis or support will remain outdoors, check that it is stable enough to withstand winter conditions.
Step 14: Check Irrigation and Watering Equipment
If your vegetable garden uses irrigation, inspect the system before freezing conditions become severe.
Depending on the system, winter preparation may include:
- Checking exposed lines
- Removing or protecting vulnerable components
- Inspecting connectors
- Addressing leaks
- Preparing hoses for storage
- Following the manufacturer’s winterization instructions
Do not assume every irrigation system should be handled identically.
The important point is to prevent avoidable damage and ensure the system is ready when the next growing season begins.
Step 15: Protect Recently Planted Perennial Vegetables
Some vegetable gardens contain perennial crops that remain in place for several years.
Examples can include:
- Asparagus
- Rhubarb
- Certain perennial herbs
- Other locally hardy perennial food plants
These should not automatically be treated like annual tomatoes or beans.
Check their individual winter requirements and pay attention to:
- Crown protection
- Drainage
- Mulch
- Exposure
- Local hardiness
The goal is to protect the established plant without creating excessive moisture around the crown.
Step 16: Check for Pests and Wildlife
Winter doesn’t eliminate every garden pest problem.
Inspect beds for:
- Rodent activity
- Burrowing
- Browsing
- Damaged bark
- Disturbed mulch
- Chewed stems
- Remaining pest habitat
Pay particular attention to newly planted or vulnerable crops.
If wildlife is repeatedly entering the garden, address the problem before winter conditions make food sources even scarcer.
Step 17: Don’t Overwork the Soil
A common winterization mistake is assuming that more digging automatically means better preparation.
Repeatedly turning or walking through wet soil can damage its structure.
Avoid working the soil when it is:
- Saturated
- Frozen
- Extremely wet
- Easily compacted
Instead, use appropriate surface protection and wait for suitable conditions when actual soil work is necessary.
Healthy soil structure is worth preserving throughout the winter.
A Practical Vegetable Garden Winterization Checklist
Use this checklist when preparing your vegetable beds:
Harvest
- Harvest mature tender crops
- Pick crops that may be damaged by an approaching freeze
- Identify hardy crops that can remain
Cleanup
- Remove finished annual crops
- Remove diseased material appropriately
- Control mature weeds
- Decide which healthy plant material can remain
Soil
- Inspect soil condition
- Check drainage
- Add appropriate organic matter if needed
- Protect exposed soil
- Apply suitable mulch
Remaining Crops
- Identify vegetables staying through winter
- Check their protection needs
- Inspect covers and supports
- Protect vulnerable perennial vegetables
Garden Infrastructure
- Clean tools
- Store removable supports
- Check raised-bed structures
- Inspect irrigation
- Secure winter structures
Final Inspection
- Check for pests and wildlife damage
- Check for standing water
- Review the weather forecast
- Confirm that vulnerable areas are protected
What Not to Do When Winterizing a Vegetable Garden
Don’t pull everything immediately
Hardy crops may continue producing, while some perennial vegetables should remain in place.
Don’t leave diseased plants without consideration
Healthy and diseased plant material should not automatically be handled in the same way.
Don’t leave all soil completely exposed
Unprotected soil can experience erosion and other winter stresses.
Don’t pile excessive mulch around crowns
Too much moisture around plant crowns can create problems.
Don’t work saturated soil
Winter preparation is not worth damaging soil structure.
Don’t forget raised beds
Their soil, drainage, edges, and exposed surfaces may require specific attention.
Don’t ignore the weather
The timing of winterization should respond to local conditions rather than a fixed calendar date.
A Simple Vegetable Garden Winterization Workflow
If you want a straightforward process, use this sequence:
1. Inspect → 2. Harvest → 3. Remove unhealthy material → 4. Decide what remains → 5. Protect the soil → 6. Mulch where appropriate → 7. Protect overwintering crops → 8. Check drainage → 9. Prepare equipment → 10. Final weather check
This approach keeps the work organized without turning winter preparation into an unnecessary complete garden teardown.
Final Thoughts
Winterizing a vegetable garden is not about making every bed empty and perfectly tidy.
It is about making sensible decisions based on the crops, soil, climate, and weather ahead.
Harvest tender vegetables before damaging cold arrives. Remove unhealthy or finished plants where appropriate. Protect exposed soil, use mulch thoughtfully, check raised beds and drainage, and give overwintering crops the protection they actually need.
Most importantly, don’t treat every vegetable or every garden bed the same way.
A well-winterized vegetable garden should enter the cold season with healthy soil, appropriately protected crops, and as little unnecessary disturbance as possible.
When spring returns, that preparation gives you a cleaner starting point for the next growing season.