When the mowing season ends, your lawn mower shouldn’t simply be pushed into a shed and forgotten until spring. Proper lawn mower winterization helps protect the engine, fuel system, battery, cutting components, and other parts from problems that can develop during months of storage.
Whether you have a push mower, riding mower, or zero-turn mower, a few preparation steps before winter can make spring startup much easier.
This guide explains how to winterize a lawn mower and how to store it properly through the off-season.
Why Should You Winterize a Lawn Mower?
A mower that sits unused for several months can develop problems even when it was working perfectly at the end of the season.
Common storage-related issues include:
- Stale fuel
- Clogged carburetor components
- Battery discharge
- Rust and corrosion
- Dirty air filters
- Deteriorated oil
- Moisture-related engine problems
- Damaged belts or cables
- Dull or corroded blades
Winterizing the mower gives you an opportunity to deal with these issues before they become bigger problems.
1. Clean the Lawn Mower Thoroughly
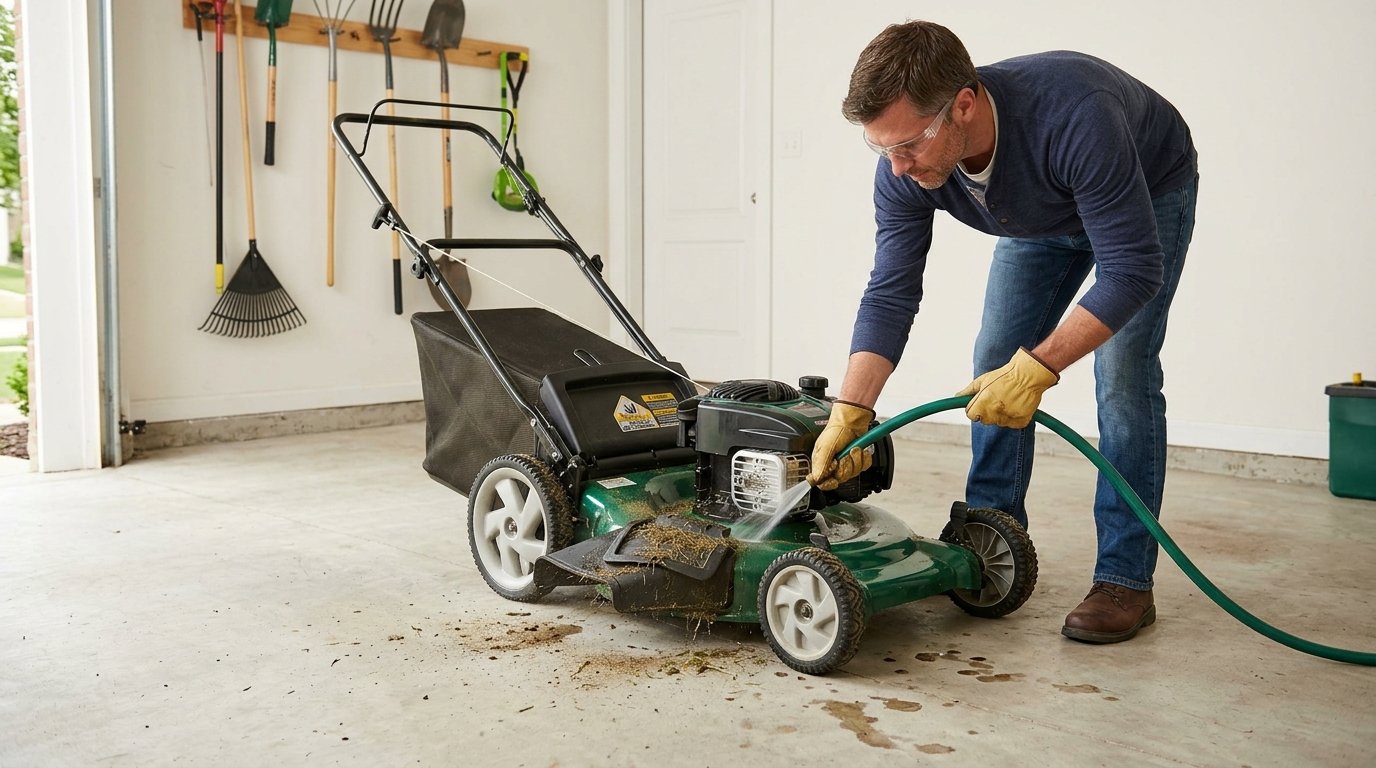
Start by cleaning the mower before putting it away.
Grass clippings, soil, and moisture can accumulate underneath the deck and around other components.
Remove:
- Grass clippings
- Dirt
- Leaves
- Mud
- Debris around the wheels
- Material underneath the cutting deck
For stubborn buildup, use an appropriate scraper or brush.
Avoid spraying water directly into sensitive electrical components, air-intake areas, or other parts where moisture could cause problems.
After cleaning, allow the mower to dry completely.
A clean machine is easier to inspect and less likely to develop corrosion during storage.
2. Change the Engine Oil
If your mower has a four-stroke engine, check the manufacturer’s maintenance schedule to determine whether the oil should be changed before storage.
Used engine oil can contain contaminants from normal engine operation. Replacing it before long-term storage means the engine is sitting with fresh oil during the off-season.
The basic process generally involves:
- Run the engine briefly if the manufacturer’s instructions allow it.
- Shut the engine off.
- Drain the old oil safely.
- Refill with the specified oil.
- Check the oil level.
Always use the oil grade and quantity specified in the owner’s manual.
Don’t guess based solely on the appearance of the oil or use a generic oil recommendation.
3. Deal With the Fuel
Fuel is one of the most important considerations when winterizing a lawn mower.
Gasoline can deteriorate during extended storage, and fuel left sitting in the system can contribute to starting problems later.
There are two common approaches:
Drain the Fuel
Depending on the mower and manufacturer’s instructions, you may be able to drain the fuel tank and fuel system before storage.
Use Fuel Stabilizer
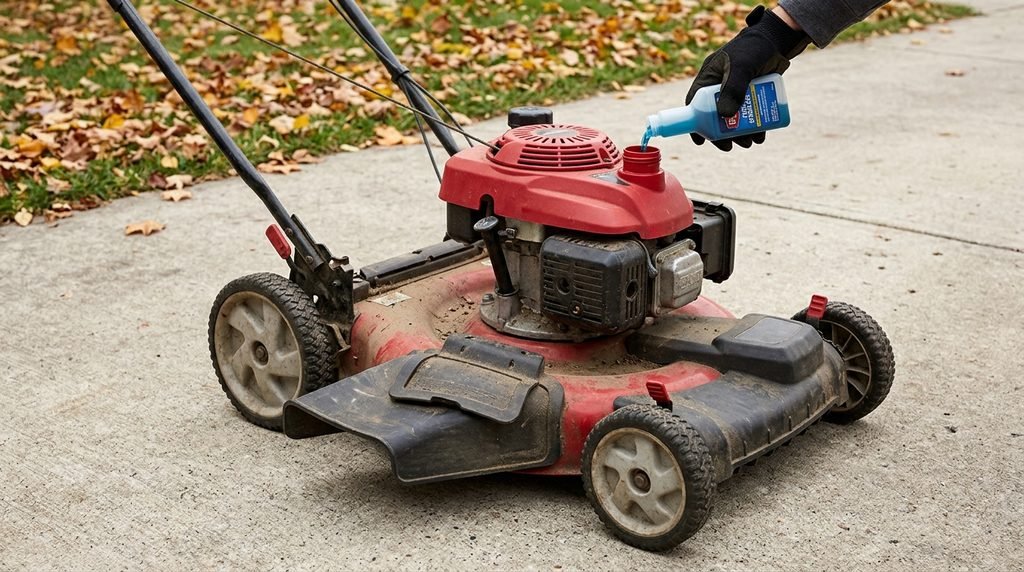
Some manufacturers recommend adding an appropriate fuel stabilizer to fresh fuel before storage.
If you use stabilizer:
- Add the recommended amount to fresh fuel.
- Run the engine according to the product and mower manufacturer’s instructions.
- Allow the treated fuel to circulate through the fuel system.
- Shut the mower down and store it properly.
The correct approach varies by mower, so check the owner’s manual before deciding whether to drain the system or stabilize the fuel.
4. Never Ignore the Owner’s Manual
Different mower designs have different storage requirements.
A push mower, riding mower, and zero-turn mower may use different:
- Fuel systems
- Batteries
- Oil systems
- Transmissions
- Hydraulic components
- Belts
- Electrical systems
Before winterizing, look for the manufacturer’s section covering storage, long-term storage, or winterization.
This is particularly important for riding and zero-turn mowers, where incorrect storage procedures can affect more components than on a basic push mower.
5. Check and Clean the Air Filter
Inspect the air filter before storage.
A dirty filter can restrict airflow and reduce engine performance when the mower is used again.
Depending on the filter type, the manufacturer may recommend:
- Cleaning it
- Replacing it
- Inspecting it only
Don’t wash or oil a filter unless its design and manufacturer instructions specifically allow it.
If the filter is damaged or excessively dirty, replacing it before storage can give you one less maintenance task to handle in spring.
6. Inspect the Spark Plug
For gasoline-powered mowers, inspect the spark plug according to the manufacturer’s maintenance schedule.
Look for:
- Excessive deposits
- Damage
- Wear
- Cracks around the ceramic insulator
If replacement is recommended, install the correct plug specified for your engine.
Avoid changing spark-plug specifications simply because another plug appears similar.
A small amount of preventive maintenance now can make the first start of the next season much easier.
7. Sharpen and Inspect the Blade
Winter storage is a convenient time to inspect the cutting blade.
Check for:
- Dull cutting edges
- Cracks
- Excessive corrosion
- Bent sections
- Other visible damage
A damaged blade should not simply be sharpened and reused.
If the blade is serviceable, sharpening it before storage means the mower can be ready for the next season.
Always follow the manufacturer’s safety procedure before working around the blade.
Disconnect the spark-plug wire on applicable gasoline push mowers and follow the manufacturer’s instructions for preventing accidental starting.
For riding and zero-turn machines, follow the specific service procedure in the owner’s manual.
8. Check the Battery on Riding and Zero-Turn Mowers
Battery maintenance becomes particularly important when winterizing a riding lawn mower or zero-turn mower.
Cold temperatures and long periods without use can cause a battery to lose charge.
Before storage:
- Clean visible corrosion from terminals appropriately.
- Inspect battery connections.
- Check the battery condition.
- Follow the manufacturer’s recommendations for charging.
- Store or maintain the battery according to the mower’s instructions.
Some batteries can remain installed with an appropriate maintenance charger, while others may be better removed and stored in a suitable location.
Don’t leave a battery connected indefinitely without understanding the requirements of your particular charger and battery.
9. Inspect Belts, Cables, and Wheels
Winter storage is also a good time for a general mechanical inspection.
Check:
- Drive belts
- Cables
- Wheels
- Tires
- Pulleys
- Deck components
- Fasteners
- Steering components on riding mowers
Look for obvious signs of wear, cracking, looseness, or damage.
If you discover a problem, record it and repair it before the next mowing season rather than forgetting about it over winter.
10. Prepare a Riding Mower for Storage
A riding mower generally requires more preparation than a basic walk-behind mower.
In addition to the standard engine and fuel checks, inspect:
- Battery
- Tires
- Cutting deck
- Belts
- Steering
- Transmission or drive system
- Parking brake
- Lubrication points
Clean grass and debris from the deck and underside where accessible according to the manufacturer’s safety instructions.
If your riding mower has specific transmission, hydraulic, or lubrication requirements for storage, follow those instructions rather than applying a generic procedure.
11. How to Winterize a Zero-Turn Mower
The basic principles of winterizing a zero-turn mower are similar to those for other gasoline-powered machines, but zero-turn models have additional mechanical components that deserve inspection.
Before storage, check:
- Engine oil
- Fuel system
- Air filter
- Battery
- Blades
- Belts
- Tires
- Deck
- Hydraulic system
- Controls
Follow the manufacturer’s storage instructions for hydraulic systems and other specialized components.
Don’t improvise with hydraulic fluids or maintenance procedures.
The owner’s manual should be the final authority for the particular zero-turn model.
12. Store the Mower in a Dry, Protected Location
Where you store the mower matters.
Ideally, keep it in a:
- Dry garage
- Shed
- Covered storage area
- Protected equipment room
Avoid leaving the mower exposed to rain, snow, and prolonged moisture.
The storage area should also provide enough space to access the mower safely.
If the mower must be covered, use a suitable breathable equipment cover rather than trapping moisture beneath an unsuitable plastic sheet.
13. Keep the Mower Away From Moisture
Moisture is one of the biggest enemies during long-term equipment storage.
Condensation can contribute to:
- Rust
- Corrosion
- Electrical problems
- Deterioration of metal components
Keeping the mower dry and protected is especially important if the storage environment experiences significant temperature changes.
Don’t store a mower while it is still wet from cleaning.
Allow it to dry completely first.
14. Don’t Forget the Next Maintenance Date
Before putting the mower away, make a note of any maintenance that will be due when you bring it back into service.
For example:
- Oil change
- Blade replacement
- Air-filter replacement
- Spark-plug replacement
- Belt inspection
- Battery check
You can also note the model number and replacement parts needed.
This simple step can save time when spring arrives.
Lawn Mower Winterization Mistakes
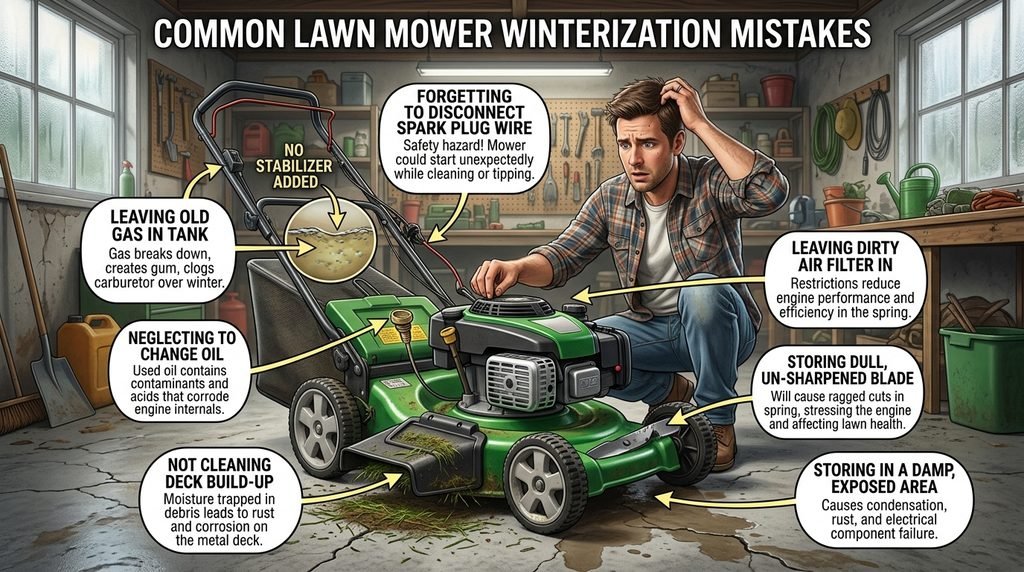
Leaving Old Fuel in the Mower
Fuel management is one of the most commonly overlooked storage issues.
Follow the manufacturer’s recommendation for draining or stabilizing fuel.
Storing a Dirty Mower
Grass and moisture left underneath the deck can contribute to corrosion.
Ignoring the Battery
A neglected riding-mower battery may be discharged or damaged by the time spring arrives.
Covering a Wet Mower
Trapping moisture beneath a cover can encourage corrosion.
Forgetting the Blade
A damaged or severely corroded blade should be addressed before the next mowing season.
Using the Wrong Oil or Fuel Treatment
Always follow the mower and engine manufacturer’s specifications.
Performing Maintenance Without Securing the Machine
Never work around blades, belts, or other moving components without following the appropriate safety procedures.
Lawn Mower Winter Storage Checklist
Before putting your mower away, check:
- Clean grass and debris from the mower.
- Allow it to dry completely.
- Check or replace engine oil as recommended.
- Drain or stabilize fuel according to the manual.
- Inspect the air filter.
- Check the spark plug.
- Inspect and sharpen or replace the blade if necessary.
- Check the battery on riding and zero-turn models.
- Inspect belts and cables.
- Check tires and wheels.
- Inspect the cutting deck.
- Complete any required lubrication.
- Store the mower somewhere dry and protected.
- Use an appropriate cover.
- Record maintenance needed for spring.
Final Thoughts
Learning how to winterize a lawn mower is mostly about preventing small maintenance issues from becoming springtime problems.
Clean the machine, deal with fuel appropriately, check the oil and air filter, inspect the cutting components, maintain the battery where applicable, and store the mower in a dry location.
For riding and zero-turn mowers, pay additional attention to the battery, belts, deck, tires, hydraulic components, and other systems specified by the manufacturer.
Most importantly, treat the owner’s manual as the primary guide. Storage procedures vary between mower models, so the correct winterization routine for one machine may not be appropriate for another.
A little preparation at the end of the mowing season can leave your equipment in much better condition when you’re ready to start mowing again.