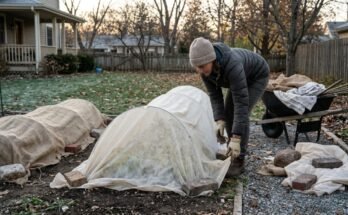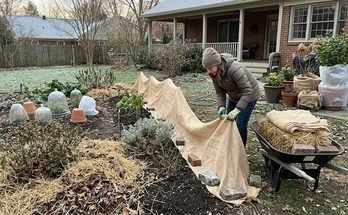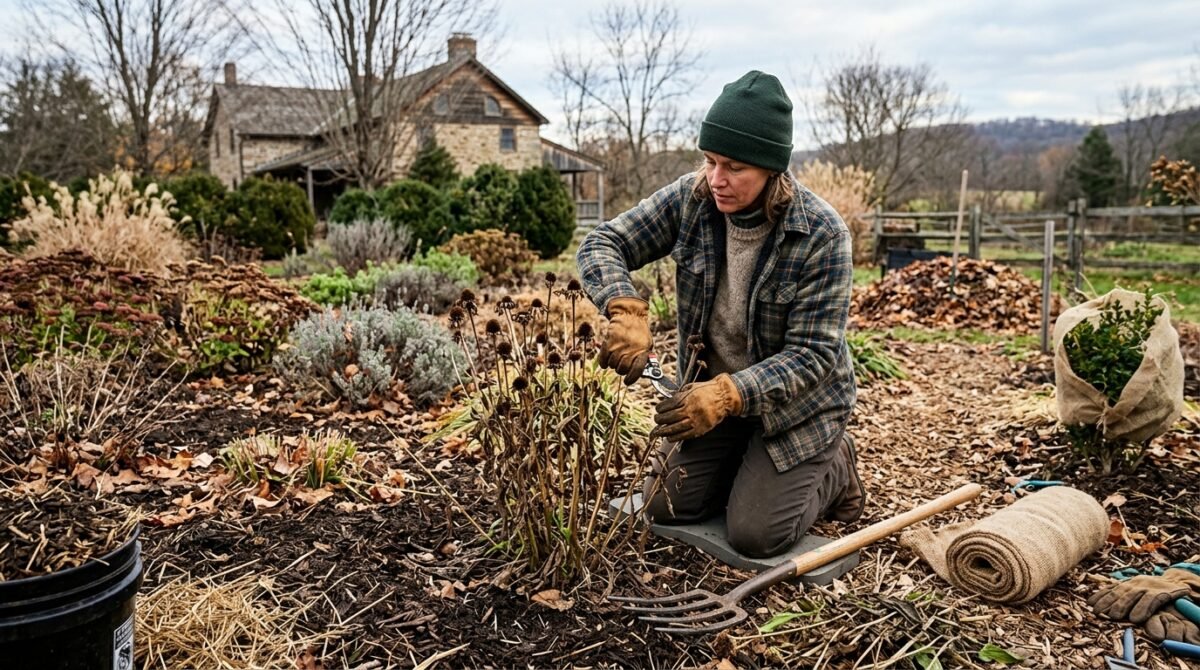
A flower garden may look finished when summer ends, but the work you do in fall can have a major effect on how well the garden handles winter and how easily it comes back in spring.
Winterizing a flower garden is not simply a matter of cutting everything down and covering the soil. The goal is to prepare the entire flower bed for cold temperatures, freezing and thawing, snow, excess moisture, and winter exposure while preserving healthy plants and useful garden habitat.
The right approach also depends on what is growing in the bed. Some plants benefit from being cut back, while others are better left standing through winter. Some flower beds need only a light layer of mulch, while exposed gardens may need additional protection.
This guide focuses on the whole flower-bed winterization process, from fall cleanup and soil preparation to mulching, watering, and final winter checks.
What Does It Mean to Winterize a Flower Garden?
Winterizing a flower garden means preparing the flower bed and its plants to survive the conditions of the coming cold season.
A good winterization routine generally includes:
- Removing unhealthy plant material
- Cleaning up weeds and fallen debris
- Deciding which plants should be cut back
- Checking soil condition and drainage
- Adding appropriate organic matter when needed
- Applying protective mulch
- Watering before the ground freezes when appropriate
- Securing garden structures and supports
- Checking vulnerable plants before severe weather arrives
The objective is not to make the garden completely bare. A healthy winter garden can still contain standing stems, seed heads, mulch, and natural plant debris that provide habitat and protection.
When Should You Winterize a Flower Garden?
The best time to begin winterizing is usually after the main growing season has ended but before the ground becomes consistently frozen.
There is no single calendar date that works for every garden. Instead, watch for practical signals such as:
- Most annual flowers have finished flowering.
- Perennial foliage is beginning to decline naturally.
- Nighttime temperatures are becoming consistently colder.
- Your area’s first hard frost is approaching.
- The soil is still workable.
- Heavy winter weather has not yet arrived.
Avoid rushing through the entire process after the first cold night. A light frost does not necessarily mean every plant should immediately be cut back.
For colder regions, it is better to complete the basic preparation early enough that a sudden freeze does not leave important tasks unfinished.
1. Start With a Flower-Bed Inspection
Before removing anything, walk through the entire flower garden.
Look at each section of the bed and identify:
- Healthy plants that can remain
- Plants that are finished for the season
- Diseased or heavily damaged foliage
- Weeds that should be removed
- Areas with exposed soil
- Spots where water tends to collect
- Plants that may need additional winter protection
- Loose stakes, supports, edging, or decorations
This inspection prevents one of the most common winterization mistakes: treating every plant in the garden exactly the same way.
A flower bed is usually a mixture of annuals, perennials, bulbs, shrubs, and other plants. Their winter requirements can be very different.
A Simple Fall Decision
| Garden Material | General Fall Approach |
|---|---|
| Healthy perennial stems | Often leave some standing |
| Diseased foliage | Remove and dispose of appropriately |
| Dead annuals | Remove after they finish |
| Healthy seed heads | Consider leaving for winter interest and wildlife |
| Weeds | Remove before winter |
| Fallen leaves | Use selectively rather than allowing thick wet layers |
| Exposed soil | Protect with suitable mulch |
| Weak supports | Repair or remove before winter weather |
The important point is to decide rather than automatically clean everything.
2. Remove Diseased Plant Material
Disease management should take priority over creating a perfectly tidy-looking flower bed.
Remove plant material that clearly shows signs of significant disease, especially when leaving it in the bed could allow problems to persist or spread.
Examples can include:
- Severely diseased leaves
- Rotten stems
- Infected flowers
- Plant material with persistent fungal symptoms
- Debris surrounding plants affected by serious disease
Do not automatically add questionable diseased material to your home compost pile. Some pathogens can survive poorly managed composting conditions.
Healthy plant material is a different matter. It can often be composted, chopped, or left strategically in the garden depending on the plant and your local conditions.
3. Decide What to Cut Back
One of the biggest misconceptions about flower-garden winterization is that every plant should be cut down to the ground.
That is not always the best approach.
Some plants benefit from being cleaned up in fall, while others can remain standing through winter. Stems and seed heads can provide visual structure and offer food or shelter for wildlife.
Before cutting back a perennial, consider:
- Is the foliage diseased?
- Does the plant naturally die back?
- Does the structure provide winter habitat?
- Can standing stems protect the crown?
- Is the plant better cleaned up in fall or spring?
- Does the particular plant have special winter requirements?
When you are uncertain, identify the plant first rather than applying a blanket rule.
A Practical Rule
Remove unhealthy material, but do not remove healthy winter structure simply because the garden looks untidy.
This approach creates a cleaner and more functional winter garden without sacrificing useful habitat.
4. Remove Finished Annual Flowers
Annual flowers that have completed their life cycle can generally be removed from the flower bed.
Pull or cut them at the appropriate point, then clear away excessive dead material.
Before removing every spent flower head, however, consider whether you want to collect seeds or allow suitable plants to self-seed.
If self-seeding is desirable, leave selected seed heads in place rather than cleaning the entire bed.
For plants that are diseased or producing unwanted volunteer seedlings, removal is usually more appropriate.
5. Control Weeds Before Winter
Fall is an excellent time to deal with weeds because allowing established weeds to remain can create additional work in spring.
Remove weeds while the soil is still workable, taking care to remove persistent roots where practical.
Pay particular attention to:
- Weeds growing around perennial crowns
- Weeds competing with young plants
- Seed-producing weeds
- Weeds growing beneath shrubs or dense flowers
- Weeds that have spread across open areas of the bed
Do not aggressively disturb the soil just for the sake of making it look perfectly clean. Excessive digging can disturb soil structure and expose dormant weed seeds.
A targeted cleanup followed by mulch is usually more useful than repeatedly turning the entire bed.
6. Clean Around the Flower Bed
Winter preparation should include the surrounding area, not just the plants.
Remove or organize:
- Broken plant supports
- Empty pots
- Damaged decorations
- Loose labels
- Fallen branches
- Excessive dead vegetation
- Debris that could harbor pests
Check edging and borders as well.
Loose materials can shift during winter storms, while broken supports can damage plants under snow or strong winds.
A few minutes spent securing the bed in fall can prevent unnecessary problems during winter.
7. Check the Soil Before Adding Mulch
Do not treat mulch as a substitute for healthy soil management.
Before applying a winter mulch layer, inspect the soil.
Look for:
- Excessive dryness
- Standing water
- Poor drainage
- Exposed roots
- Erosion
- Compacted areas
- Bare soil around plant crowns
If water regularly pools in the flower bed, simply adding more mulch may make the situation worse.
Winter moisture can be as problematic as winter cold. Roots sitting in saturated soil may suffer from poor oxygen availability and increased risk of rot.
Protect the Root Zone, Not the Plant Crown
When applying mulch, keep it from being piled tightly against the base or crown of plants.
A thick mound of wet material directly against a plant can retain excessive moisture and create an environment favorable to decay and pests.
Spread mulch around the root zone while leaving the immediate crown area appropriately clear.
8. Apply a Protective Mulch Layer
Mulching is one of the most useful general steps when preparing a flower garden for winter.
A suitable mulch layer can help:
- Moderate soil temperature fluctuations
- Reduce repeated freeze-thaw stress
- Protect shallow roots
- Reduce soil erosion
- Retain useful soil moisture
- Suppress some winter weeds
Common options include:
- Shredded leaves
- Clean straw
- Compost
- Pine needles
- Chopped organic plant material
- Wood-based mulch appropriate for garden use
The ideal material depends on your climate, soil, plants, and what is readily available.
Avoid Excessive Mulching
More mulch is not automatically better.
An excessively thick, wet layer can:
- Hold too much moisture
- Smother low-growing plants
- Encourage rot
- Create hiding places for pests
- Delay soil warming in spring
Apply enough to provide useful protection without burying the plants.
9. Water the Garden Before the Ground Freezes When Needed
Winter does not eliminate the need to consider soil moisture.
In areas where autumn is dry, plants may enter winter already stressed from insufficient moisture.
Before the ground freezes, check whether the flower bed is adequately hydrated, particularly around established plants and newly planted specimens.
However, do not water automatically just because winter is approaching.
Avoid watering when:
- The soil is already saturated
- Heavy rain is expected
- Drainage is poor
- The ground is frozen
- Temperatures are unsuitable for the water to soak into the root zone
The objective is to enter winter with healthy soil moisture—not to keep the garden wet.
10. Protect Vulnerable Areas of the Flower Bed
Not every part of a flower garden experiences the same winter conditions.
Pay attention to locations exposed to:
- Strong prevailing winds
- Heavy snow
- Repeated freezing and thawing
- Winter sun
- Rapid temperature changes
- Poor drainage
Plants in exposed locations may experience greater stress than those protected by buildings, fences, or other vegetation.
If certain plants require specialized protection, handle that separately according to their individual requirements rather than applying the same covering to the entire flower bed.
This distinction is important because whole-bed winterization and plant-specific winter protection are not the same task.
11. Check Flower-Bed Drainage
Before winter settles in, inspect areas where water tends to collect.
Poor drainage can become especially problematic when temperatures repeatedly move above and below freezing.
Look for:
- Puddles that remain after rain
- Soil that stays saturated for long periods
- Blocked drainage routes
- Low areas where runoff accumulates
- Soil compacted by foot traffic
If a flower bed has a persistent drainage problem, address the underlying cause rather than trying to solve it with additional mulch.
In some cases, the best winter preparation is simply making sure excess water can leave the root zone.
12. Secure Stakes, Supports, and Garden Structures
Flower gardens often contain structures that can become vulnerable during winter.
Inspect:
- Plant stakes
- Trellises
- Decorative arches
- Plant cages
- Edging
- Raised-bed borders
- Garden ornaments
Remove structures that are no longer necessary or secure them properly.
Do not leave weak supports in place simply because they are part of the garden. Snow, ice, and wind can turn unstable structures into sources of damage.
13. Give the Flower Bed a Final Inspection
After completing the main work, walk through the garden one more time.
Check:
- Are diseased plants removed?
- Are unnecessary weeds cleared?
- Are healthy winter stems intentionally left?
- Is the soil protected?
- Is mulch evenly distributed?
- Are plant crowns free from excessive mulch?
- Is drainage functioning?
- Are vulnerable areas identified?
- Are supports secure?
- Is the bed ready for the first serious freeze?
This final inspection is particularly valuable in regions where winter weather can arrive suddenly.
What Not to Do When Winterizing a Flower Garden
Good winterization is partly about knowing what to leave alone.
Don’t Cut Every Plant to the Ground
Healthy stems and seed heads can have winter value. Some plants also benefit from retaining their natural structure.
Don’t Remove Every Fallen Leaf
Leaves can contribute organic matter and provide habitat. Remove excessive or diseased material, but avoid treating every leaf as garden waste.
Don’t Pile Mulch Against Plant Crowns
Keep the root zone protected without creating a constantly wet environment around the crown.
Don’t Ignore Drainage
A thick mulch layer cannot compensate for a flower bed that remains waterlogged.
Don’t Work Wet or Frozen Soil Aggressively
Digging saturated or frozen soil can damage its structure and create unnecessary compaction.
Don’t Assume Every Flower Needs the Same Protection
Plant type, exposure, climate, and soil conditions all affect winter requirements.
Flower Garden Winterization Checklist
Use this checklist before winter weather becomes established:
- Inspect the entire flower bed
- Identify healthy and unhealthy plant material
- Remove diseased debris
- Remove finished annuals where appropriate
- Control established weeds
- Decide which perennial stems should remain
- Collect selected seeds if desired
- Check soil moisture
- Inspect drainage
- Protect exposed soil with suitable mulch
- Keep mulch away from plant crowns
- Secure stakes and garden structures
- Remove damaged or unnecessary materials
- Identify plants requiring individual winter protection
- Complete a final pre-freeze inspection
A Simple Flower Garden Winterization Workflow
If you want a straightforward order of operations, use this sequence:
Inspect → Clean → Decide → Weed → Check Soil → Mulch → Secure → Final Check
Inspect
Walk through the entire flower bed and identify problems.
Clean
Remove diseased material, finished annuals, and unnecessary debris.
Decide
Determine which healthy plants and seed heads should remain through winter.
Weed
Remove established weeds before winter.
Check Soil
Look at moisture, drainage, exposed roots, and erosion.
Mulch
Apply an appropriate protective layer without covering plant crowns.
Secure
Check supports, edging, structures, and loose garden materials.
Final Check
Make sure the garden can handle the expected winter conditions before the ground becomes frozen.
What a Winter-Ready Flower Garden Should Look Like
A properly winterized flower garden does not necessarily look perfectly clean.
You may still see:
- Standing perennial stems
- Seed heads
- A layer of mulch
- Some natural plant material
- Dormant plants
- Protected root zones
That is perfectly acceptable.
The goal is not to create an empty flower bed. The goal is to leave the garden healthy, protected, stable, and prepared for winter.
A little natural structure can also make the winter garden more visually interesting while providing useful habitat.
Final Thoughts
Winterizing a flower garden is less about doing more and more about doing the right things at the right time.
Remove unhealthy material, control weeds, protect the soil, apply mulch thoughtfully, maintain good drainage, and avoid unnecessary cleanup of healthy plants. At the same time, remember that individual flowers and perennials may have their own winter requirements that deserve separate attention.
The best winter preparation leaves the flower bed clean enough to be healthy, natural enough to support beneficial garden life, and protected enough to withstand the conditions ahead.